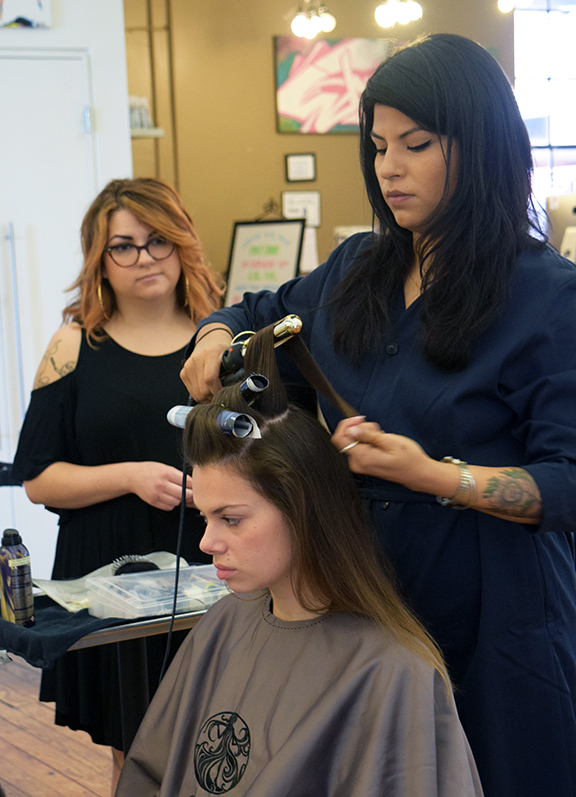
Wednesday morning, Oribe Educator and NYC stylist, Mandee Hernandez joined the Alter EGO team for a brand new educational experience. Pin Curls have been around since the 1940s, but Poppiottes are an Oribe creation. Mandee and Katie refreshed our knowledge on the classic Pin Curl, refining the technique to get bouncy spirals, along with how to tease out the curls for maximum body and fun. The next section of the class focused on Poppiottes, curls using rolled up magazine pages in place of curlers. Using lightweight magazine paper puts less stress on the hair than curlers, and it's sustainable--a great way to recycle old magazines. Poppiotte curls also lend themselves perfectly to updos. Mandee demonstrated both curl techniques, along with an updo style using the Poppiotte curls, then the stylists each got to test out one of the looks on their own models. They had tons of fun learning and practicing, and the results turned out FABULOUS!
Rainbows & Oil Slicks & Jewel Tones, Oh My!
Alright, fellow Pinterest fiends. Let’s talk rainbow hair. Pinterest is well-saturated with gorgeous, long, colorful locks that give us all a hearty case of #hairenvy, but are they real? What’s the reality of achieving #mermaidhair status? Stylist Elizabeth Croft and I are going to take you through our 9 hour journey of “replicating” our very own “Pinterest-worthy” hair. Now, “replicating” deserves the quotations because we went into this with the understanding that exact replication when it comes to hair is nigh impossible due to differences in hair texture, health, starting color, etc. along with the fact that every stylist utilizes different coloring techniques. Not to mention a little thing called Photoshop, infamous on Pinterest for not only enhancing, but completely altering the hair color. (Ever seen the same photo in six different colors? Yeah, that's good ol' Photoshop.) Inspiration is awesome, but expecting precise replication just isn’t realistic.
Hair color is a journey, and mine came to this new leg of the adventure with an extensive history already. It sported a heavy balayage/ombre with a demi-permanent purple over top for seven months, along with a root color 2-3 levels darker than my natural color. To top that off, I had approximately five weeks of regrowth. All of these factors play into how your stylist formulates your color, and for a project as big as ours, it required several steps.
Step One: All over foiling of the Center of the Hair Strand
First, we needed to lift the existing color from my hair. We used lightener on the center of my hair, leaving the roots and ends.
Step Two: Bleach wash on the Ends
Next, we washed the lightener off of the center and then did what we call a bleach wash—a combination of lightener and shampoo—to remove the purple from the ends of my hair. Elizabeth says, "I chose to do it that way because it gave me more control over how much color lifted and kept lightener on the ends for the least amount of time." She added that, "It's less damaging that way."
Step Three: Lighten the Roots
Elizabeth explains that, “Previously colored hair and virgin hair process lightener and color differently. Because of this I chose not to include the root in the initial foil. Once I got the midshaft to ends, or everything but the root of her hair, to the right levels I went back and lightened just at her root.”
Step Four: Toner Time
Next we toned all over to create a more even surface for the color melt that was about to take place. Elizabeth adds, “You might notice that I didn't lift all of her hair to a very pale blonde. I wanted some remaining pigment in her hair so that the fun colors I used would process more as rich, jewel tones rather than very bright, shocking colors. The "oil slick" look has been on trend so that was part of my inspiration.”
Step Five: Color Melting!
For the next two hours, Elizabeth created an artistic masterpiece on my head, blending four colors onto every strand of hair. “When I started the color melting process on her hair I used a brighter magenta at her root because I wanted a surprising pop of color in an unexpected place. The contrast between the deeper purples, blues, and greens against the more vibrant magenta added the dimension I needed to keep the color very interesting, but also wearable.”
Considering drying time in between each step and how much hair I have (a lot!) it took the better part of nine hours to complete the entire process. We chose to do this all in one go, but often this process would have taken 2+ visits to fully achieve the look. Having rainbow hair is pretty amazing, and it was totally worth it, but any color this extensive should definitely be viewed as an investment. The cost involved, along with the more frequent salon visits necessary to maintain the look should be considered when deciding if you want to jump into the creative color world.
Talking through what you want, along with what’s possible for your hair is always the best way to begin a new step in your hair journey, whether that’s going lighter, adding in new colors, or creating a whole new look. We offer complimentary consultations with the stylist of your choice for any service, so whenever you’re ready to take the next step in your hair journey—give us a call!
Behind the Brand: Smith & Cult by Amanda Gallegor
"Smith & Cult is an expression of our unrefined thoughts and feelings."
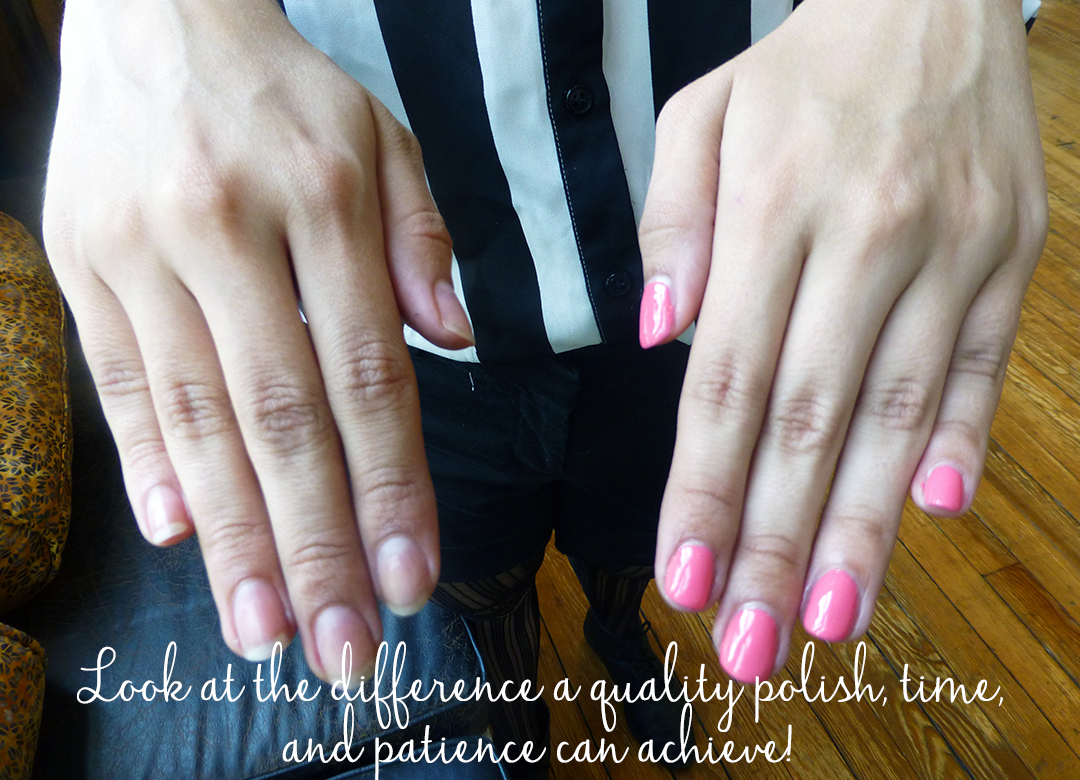
When it comes to the beauty industry, three things come to mind: Hair, Skin, and Nails. While hair and skin have always been in the spotlight, it was only recently that people started paying attention to their nails and what they are putting on them. Nowadays you can't watch TV or read a magazine without seeing advertisements covered with beautiful colors and promises of "A Salon Manicure at Home." While these all seem exciting, the promises are usually cut short and people find their nails not staying as flawless as the advertisements promised. Getting a "Salon Quality" manicure at home is hard, but with the right products and a little bit of patience, you can have beautiful nails from the comfort of your own home, and lucky for you, we sell these products at AlterEgo!
Smith and Cult was created by Dineh Mohajer (anyone remember Hard Candy from the 90's?!) who wanted to create a high performing lacquer that was also a 5-Free formula (which means it doesn't contain Dibutyl, Phthalate, Toluene, Formaldehyde, Formaldehyde Resin and Camphor.) After creating Hard Candy in the 90's, Mohajer joined forces with Jeanne Chavez. The duo became a beauty industry powerhouse, creating trends and selling Hard Candy to LVMH in 1999 to go on to their next project: Smith and Cult.
When using a high quality lacquer, patience is key. You don't want to rush, so make sure you have some time to spend on yourself. The whole point of painting your nails is to enjoy it, not make it into another chore!
Step One: Prep your nails.
Oil is the enemy here. Clean each nail with Polish Remover and remove all old polish. This is a good time to file and trim them as well! Definitely avoid lotions in this step.
Step Two: Super prep your nails.
Yeah, you just took off all the old stuff, but we're humans and we create a lot of oil. Grab some rubbing alcohol and clean each nail; it will ENSURE the lacquer sticks to your nails and no oils will ruin them.
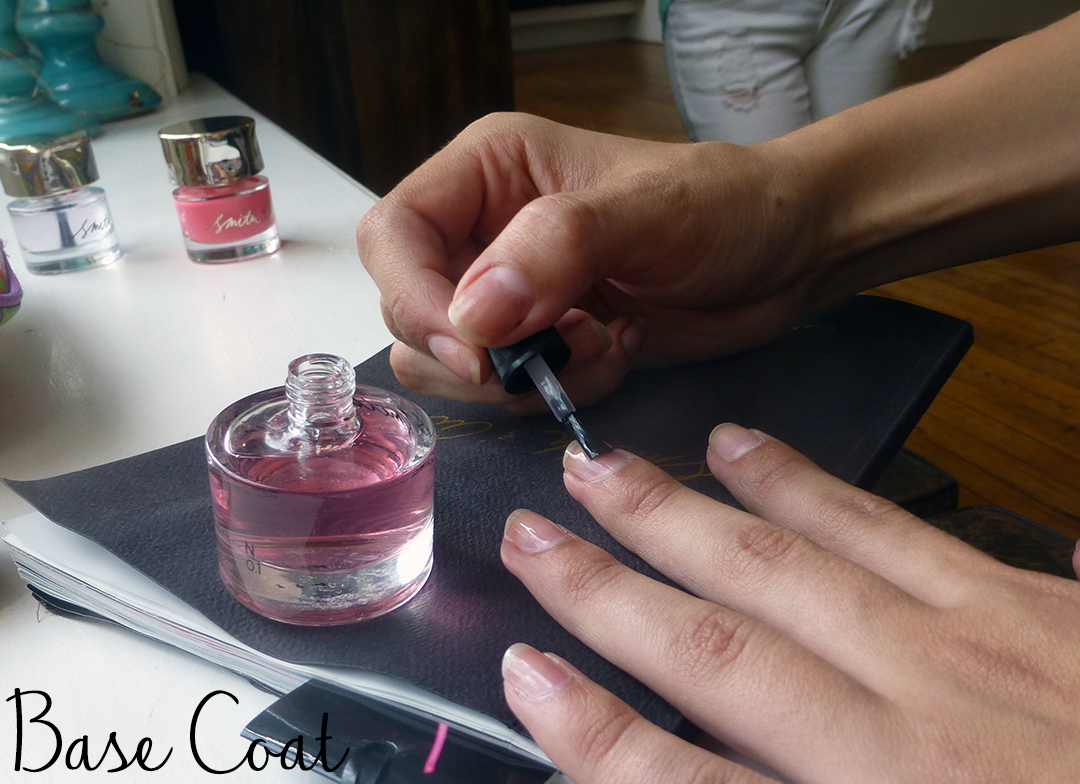
Step Three: Base Coat
Use the same brand. Each nail polish line is created using different formulas, so using the same brand will ensure even application and a solid fusion between the coats. You don't need to glob it on either; a quick, even coat is all you need. Make sure to coat your ENTIRE nail.
Step Four: Color
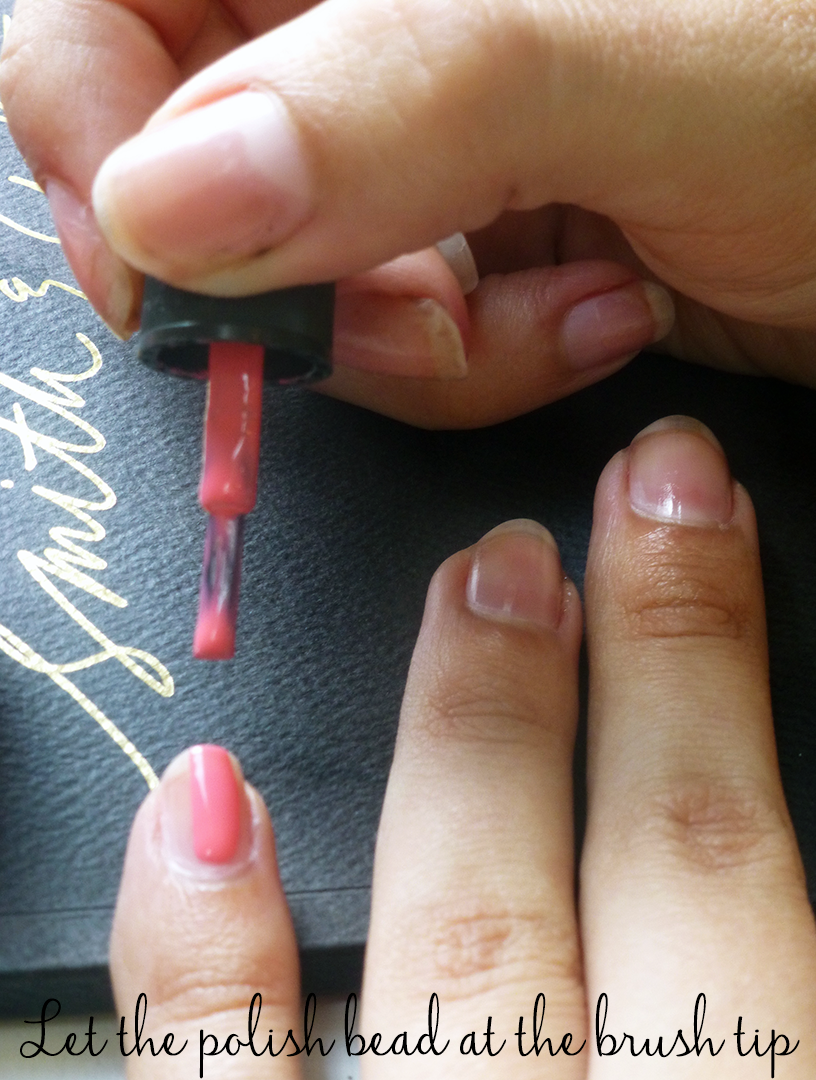
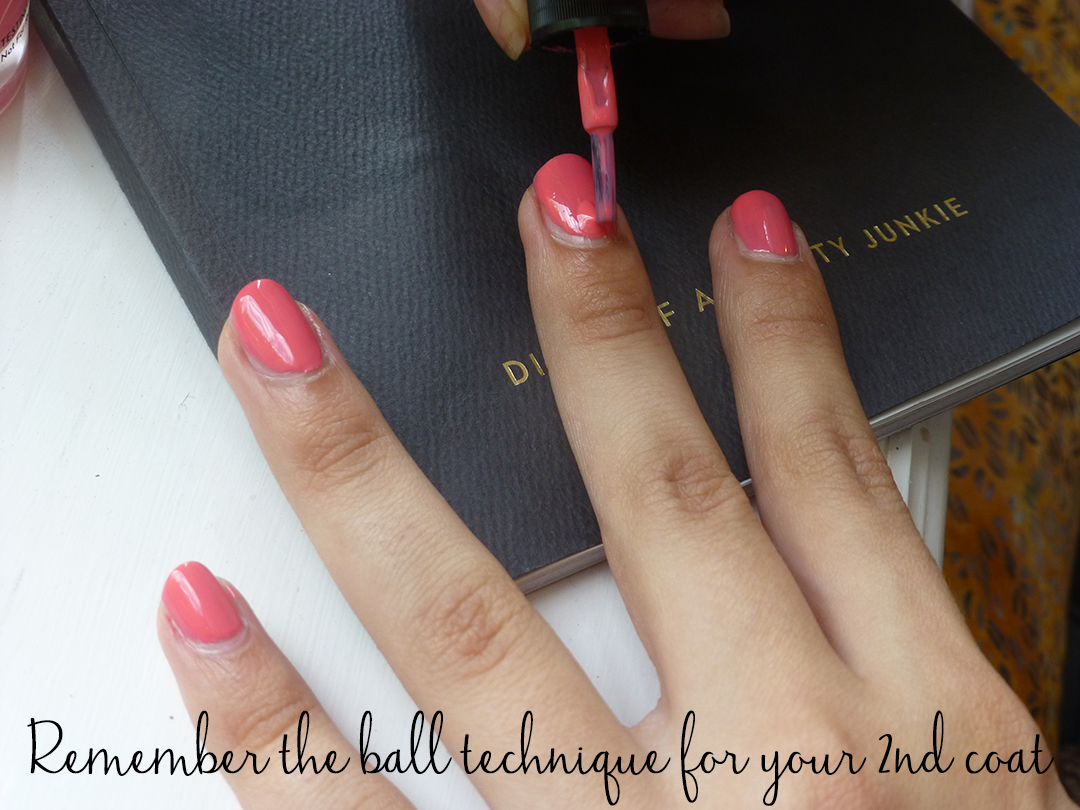
Pick your favorite. I picked Psycho Candy, but the cool thing about S&C is that they have soooo many different options! Make sure the base coat is dry (takes about a minute) and start. Don't rush this step--use the ball method. Make a small ball of polish at the top of the nail and pull it down, then swipe once more on the left, and once on the right. Once you get this technique down your nails will ALWAYS look like you got them done professionally. You don't want to glob the polish on; it needs to dry, so thin layers work best. Let this dry for about 5 minutes, then apply coat #2, staying thin and consistent throughout. Take your time. Doing your nails should be fun!
Step Five: Top Coat
ALWAYS follow with a top coat. It ensures the color is sealed in, but many are also formulated to stay shiny and resist chips. Coat your entire nail (and go over the free edge a bit) to lock in the lacquer. LET THIS DRY. This step is crucial, so give yourself 15 minutes or so to let them air dry. Blowing on them will create bubbles and putting them in cold water will crack the polish, so just be patient. Trust me, it's worth it
Once everything is done, sit back, and stare at how awesome your nails look. When anyone asks who did them, you'll smile and know it was yourself, and you can tell them to come to AlterEgo in Raleigh to pick up their own bottle of Smith & Cult.
Right now, we are offering a Buy Two Get One Free deal for all Smith and Cult polishes--definitely take advantage of this special to get your base coat, top coat, and favorite S&C color!
Guest Author: Amanda Gallegor, Salon Assistant and Polish Connoisseur
Tips & Tricks to Make Your Color LAST!
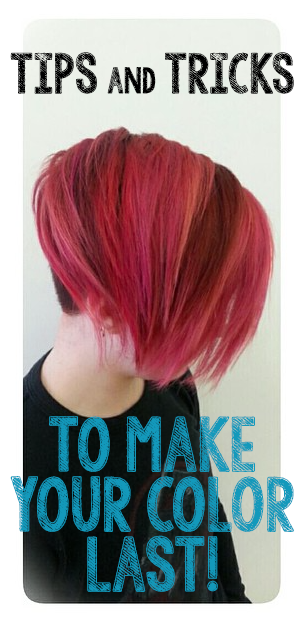
“If I pay for a color, I want it to stay, ya know?” An exact quote from a conversation with a friend recently, but anyone who has ever paid to color their hair (and even if you’re a box color DIYer, you pay for it) has either said or thought these words. Whether you were born to be a redhead (but genetics made you brunette), or you’re convinced blondes have more fun (but the sun just isn’t working fast enough) once you decide on your hair color and invest in it, you want it to last. And really, when you think about it, your hair color IS an investment. The saying goes “you get what you pay for,” but I’d like to rephrase that to, “When you invest in quality, you get quality in return.” If you want your color to last, there are a variety of actions you can take to increase the longevity of your investment.
1. Embrace the idea that water is the enemy.
We’re talking in terms of hair here—you better be drinking that 64+ ounces a day. When it comes to hair color, water is the number one cause of color fade. Why? Short answer: science. Long answer: hair color is essentially a manipulation of the pigment molecules in your hair. Different levels of color work in different ways (Demi, permanent, etc) but ultimately, they all have to do with influencing or altering molecules. Water, particularly hot water, opens the hair cuticle, which allows the color molecules to escape more easily—which is why you see your color draining away into the bottom of your shower. If you want your color to last, reduce the amount that you wash your hair. Invest in a good dry shampoo that will prolong your clean hair, and if you have medium to long hair, learn to work that day three updo (my personal fave trick).
2. While we’re talking water… let’s talk about the COOL factor.
As mentioned above, hot water opens the hair cuticle the most, so washing your hair with cool or cold water will reduce the amount of color leakage (though not eliminate). No matter what, washing your hair is going to lighten or fade the color eventually. That, again, is a matter of science.
3. Rolling with the washing topic… Every shampoo was NOT created equal.
Utilizing a color-safe shampoo is essential for prolonging the life of your color. There’s a variety of ones available—our favorites, of course, are R+Co’s Gemstone, and Oribe’s Shampoo for Beautiful Color. Or for blondes… Oribe’s Bright Blonde Purple Shampoo. When it comes to the topic of shampoo, there’s a lot of terms thrown around that can make the search for the right one confusing. Sulfate-free, clarifying, paraben-free to name a few… but the reality is that you should focus on the quality of the ingredients in your shampoo. Sulfates are what make the suds in cleansing products of all kinds, but like most everything else in life, there are extremely low-quality sulfates (the kind that can irritate your scalp, and can contribute to a quicker loss of color), and there are extremely high-quality sulfates as found in some of Oribe’s shampoos along with other salon-quality brands. Clarifying shampoo is another case of quality DOES count, and sparing use will not have a significant affect on your color. For more info on parabens see this article (http://articles.latimes.com/2011/may/08/image/la-ig-beauty-parabens-20110508).
4. Your hair needs sun protection as much as your skin!
Sun darkens skin, but lightens hair, and that includes colored hair. Find a styling product that includes UV protection or buy yourself a really cute pool/beach hat. Just as your skin is damaged when out in the sun for too long with no protection, your hair can be affected in the same way. Not to mention, the term sun-kissed highlights came about due to naturally sun-lightened hair—the sun will do its best to lighten your hair whether colored or not.
5. Speaking of summertime… Chlorine is a chemical and it WILL alter your hair.
Avid swimmer? Live at the pool? If you swim for fitness and have colored hair, embrace the swim cap! Even if you don’t have colored hair… chlorine dries and damages hair, so strongly consider protecting it either way. If you just love to soak in the cool water… pin that hair up on top of your head and keep your head above the water. Refer to preservation tip #1… water is the enemy! Same goes for the beach, even though there’s no chlorine. The more you wet your hair, the more color will have a chance to escape whether there is shampoo involved or not. If you do swim or want to dunk your head, consider investing in a chlorine neutralizer. You can spray this on before, after, or both, and it will work to counter-balance the effects of chlorine.
6. Glazes/Glosses/Toners are your FRIEND.
If you love the shine of newly colored hair, or want your color freshened up without paying for another full on coloring session… ask your stylist about glazing or glossing your hair. Known also as toners, these are non-peroxide sheer colors that can brighten or subtly change your color, along with conditioning your hair. They last approximately 4-6 weeks, and are a great way to prolong the time between highlights or full colors.
7. INVEST in a deep conditioner or masque for your hair.
Coloring or lightening your hair automatically alters it. Remember the manipulation of molecules? Science-y stuff happens no matter what kind of color. Thus, you want to make sure to treat your hair extra well following the color to improve its health. Using a deep conditioner once a week will add some hydration back into your hair, and helping to maintain the health of your hair.
8. Hand-in-hand with deep conditioners, heat protectants keep your hair healthy!
If you style your hair with heat of any kind—blow dryer, straightening iron, curling iron, etc… you should invest in a good heat protectant. This can come in the form of oils or a variety of sprays, and will act as a shield between your hair and the damaging effects of heat. Healthy hair takes color more evenly, so if you color your hair regularly, you want to take the best care possible to ensure your hair is healthy enough to smoothly accept the color treatment.
IN SUMMARY: Prolonging the life of your color requires an investment of more than just the actual color service. By design, color treatments alter your hair—ever heard the phrase “Every action has an equal and opposing reaction”? Coloring your hair requires a “reaction” (see: steps above) to ensure the integrity and health of your hair. If you have any questions about what might be best for YOUR hair… talk to your stylist!! They love to educate clients about the coloring process, and how to extend the life of their work… aka your hair!
Defining Hair Color: BALAYAGE
If you pay even the teensiest morsel of attention to the fashion world, the obnoxious to spell and ever more challenging to pronounce, BALAYAGE is probably on your radar. If it’s not, it should be. Balayage, pronounced, Bah-lay-ahj, comes from the French word meaning “sweeping.” The coloring technique is thus named due to the nature of painting or sweeping the color onto the hair. Like most things in the fashion world, balayage has been around for a while (since the 70s), but has made a fierce comeback in the past couple of years due to it’s many enticingly fabulous qualities. The painted, free-hand technique of balayage is super cool for many reasons; first, it’s entirely customizable. Just like the ombre, we’re a huge fan of anything that can be catered to the individual. The tone of the highlights, the amount of painted pieces, and how bold or subtle they are can all be designed for your style and preference. No matter your hair color, balayage can be molded to suit you! The artistic technique of balayage also allows for a really natural looking highlight. Remember when you were a kid and your hair used to get those gorgeous natural highlights in the summer? Balayage can mimic that sun-kissed glow.
Also like the ombre, balayage has more of a “grown-out” look than traditional foiled highlights. This means it’s a low-maintenance style that can be worn for much longer. In the fast-paced, always busy world of today, getting into the salon every few weeks can be a challenge. Those every-four-weeks root retouches can go out the window with balayage!
Take note though, balayage is not ombre. Despite the fact that they have many commonalities, the ombre and balayage styles are quite different. The ombre is a full color gradation going from one solid color gradually to another. Balayage is a type of highlight, where strands are chosen and painted. Due to their widespread popularity, stylists have experimented with a combination of the two so you MAY see the terms put together -- a balayage ombre. This would be lower balayage pieces that have a gradation of their own. The effect of lighter ends and darker roots, but not from one full solid color to another full solid color. The highly customizable nature of both color techniques, along with the artistic emphasis allows stylists to really experiment and create variable looks.
This brings us to our final favorite balayage feature. Hair stylists are essentially artists, especially here at Alter EGO. They love to create customized looks for their clients, and are inspired by each person’s uniquities. Because balayage can be done so many different ways it gives the stylist some flexibility to really be creative and design a look that is just perfect for YOU. It’s the perfect season for beachy sun-kissed highlights, and it’s always the perfect time for a new custom look. Now that you know how to pronounce the darn word, and what exactly it is, come in and see one of our balayage experts to enhance your summer style!
For more information about balayage, check out these two fabulous articles:
http://www.marieclaire.co.uk/blogs/545771/so-what-exactly-is-balayage-why-do-we-love-it.html
http://www.vogue.com.au/beauty/hair+insider/what+is+the+balayage+effectr,13857
Defining Hair Color: OMBRE
The hair world loves to come up with all sorts of names for different styles of color: highlights, lowlights, balayage, ombre, sombre, babylights, ecaille… the list goes on, and that doesn’t even touch on the different shades of color: warm, cool, golden, reds, etc. But what exactly do all of these labels mean?! Understanding what defines each color type can help you better communicate to your stylist what you are looking for. We wanted to explore the differences between these color types through a series of posts explaining a little bit about each one and then differentiating it from the others. Let’s start off with the OMBRE. An ombre is literally a graduation from light to dark. This word has become all-important in everything fashion from hair to nails to clothing fabric: ombre is everywhere. Some people would have you believe that the ombre is fading away, but it’s definitely still relevant, and there’s a few reasons why we still LOVE this trend.
First, you can completely customize it to suit your hair and style. Ombre can be vibrant and bold, or a subtle fade (aka sombre); it can be done on long hair, short hair, or in between, and each way gives a totally different vibe and style. The ombre is so versatile that people have taken it in all kinds of creative directions… there are red ombres, extremely dark to extremely light ombres, and even multi-colored ombres as well. Whatever your color preference and style, the ombre is the chameleon of hair color and will match YOU!
Our second favorite aspect of ombres is the low-maintenance factor. Because it’s designed to look like a “grown-out” color, the 4-6 week root retouch goes out the window, and you can wear the color for a much longer time, stretching out your salon visits. While this does mean that the ombre is significantly more work up front—expect approximately three or more hours in the salon—and comes at a slightly higher price tag, it’s totally worth it if you prefer the low-maintenance hair life.
Alongside the low-maintence aspect, ombres are pretty easy to transition away from once you’ve decided you’re done with the look. If you’ve kept your roots and mid-lengths at or close to your natural color, you can choose to either chop off the lightened ends if you’re up for a fun, shorter ‘do, or you can color the ends back to your natural color. Either way, there’s less of a growing out, transitional process as sometimes occurs when you’ve decided to grow out, say a full head of classic highlights.
We definitely still dig the ombre, and are looking forward to customizing YOUR ombre look. Look for our post about BALAYAGE coming soon!
Rainy Day Hair Cures
As the saying goes, April is the month of showers and it has definitely proven to be so thus far. We all know that the rain doesn’t end when the May flowers arrive, however. Here at Alter EGO we are armed and ready with all of our favorite tricks to combat the Spring air-induced frizz and the dreaded grey rainy days. Our newest favorite rainy day cure is the unstoppable FOIL spray from R+Co. Foil is as multifaceted in ability as the shiny silver bottle. It vanishes static, smoothes stubborn flyaways and frees your hair from frizz!
Our other Spring-Summer obsession seems to have been made for the North Carolina humidity. ORIBE’s Anti-Humidity Spray does its best work on those sticky humid days that we all know are right around the corner. The spray actually has advanced polymers that push moisture away from the hair. It allows your hair to hold its style, even through our humid NC days.
We are head over heels for Foil and the Anti-Humidity Spray, but sometimes you just need a really good thunderstorm afternoon hair-do. On those days, our fabulous stylists suggest the following tips and tricks!
Dig out those headbands and rock them in style! Alisha’s rocking her retro polka dots, but we also love the bandanas as headbands trend. The coolest thing about headbands is that you can mix and match them to your outfit. Simple gold headband for the office… switch it out for your favorite stretchy headband on your way to the gym.
Our other classic rainy day hairdo is braids and twists. Learning to braid your own hair takes practice, especially for people with slightly less coordinated fingers (aka me). If you’re not yet up for braiding your hair, twisting it back is something that everyone with a few bobby pins can do. Either choice gives you a styilsh updo that even walking to work in the rain can’t destroy.
And of course, sometimes you just need to embrace the natural texture of your hair. With thick wavy hair, Alli knows the struggle of rainy days, but she looks absolutely fabulous sporting her rained on waves. Finding the right product to enhance your natural hair can make all the difference in being able to love your curls, waves, or straight locks on those days when the weather just doesn’t cooperate.
As always, if you need some hands-on help mastering your fave rainy day 'do just ask your stylist at your next appointment for some quick pointers and ideas. Surprise surprise, Saturday's forecast is calling for rain... which look are you going to choose?
The Beginnings of an Oribe Love Affair
ORIBE is not just a high performance luxury line of products. The products are an embodiment of their namesake, Oribe himself. Fashion connisseur, runway innovator, hair lengend—Oribe has been making waves in the hair industry for decades. He has designed iconic runway hairstyles, styled countless Vogue covers, and hand-crafted his collection of hair products.
Marrying his artistic vision with the scientific knowledge of lead formulators, Oribe created a selection of products that utilize the finest natural ingredients while showcasing the industry’s newest advancements in hold, volume, and shine.
Summer Campbell, a Luxury Brand Partners Product Specialist, spent the morning with our stylists teaching them the ins and outs of the Oribe line. After a couple of hours with Summer, our stylists had tons of new information to share!
These are a few of their favorite things…
“The Smooth Style Serum for crazy flyaways – it also has moisture, shine, and hold.” – Dana Hunter
“Split End Seal because it heals 94% of split ends with continual use. With personal experience going from black to blonde, it’s worked for me.” – Meghann Holland
“You’re supposed to mix and match the Oribe Shampoo & Conditioners to create a completely customized prescription for the hair.” – Brittany Cline
“I’m excited about the curl products. I have curly hair and know the struggle of curly crunchy hair. We want to have soft curls and I’m confident this will do it!” – Danielle Duarte
“I was really excited to learn about the Surfcomber mousse because it can give you texture and beachy waves without being crunchy.” – Erika Kozlowski
“We learned how to make prescriptions for clients using the products to fit their needs. It’s a 4 step process: shampoo & condition, prep, style, and finish. Also, all of their products are made in America.” – Alli Carter
“Every 3 minutes one Oribe Dry Texturizing Spray is sold in America.” – Madison Hancock
“Split End Seal is my favorite because it heals 94% of ends and prevents 65% of breakage. Great for my fine-haired and bleach out clients.” – Shawna Causey
“It’s really cool that there are silk amino acids in the shine shampoo and conditioner—you’re literally putting silk in your hair.” – Aspen Teal
"The Aprés Beach spray because it gives you that super natural beachy hair... it's more than just a texture spray, it actually enhances your natural body and wave, perfecting that beachy look!" – Erin Doak
"The shampoos and conditioners are not just color-safe, but are also safe for hair that has been treated with Keratin. It's really awesome for clients who have a Keratin treatment on their hair and fall in love with Oribe. They don't have to compromise on taking care of their hair!" – Elizabeth Croft
Have any Oribe questions? These ladies would love to tell you all about it! Give us a call, ask below, or ask your stylist at your next visit! We're officially #oribeobsessed... are you?